русский
1. Form a master pattern.
This is the actual object you want to eventually be out of metal. The pattern can be made out of anything that holds its shape at least reasonably well. Sculpy or modeling clay are both good choices because they hold their shape well, and are easy to form. You should probably bake sculpy after forming it into the desired shape.
2. Make a mold.
A mold is the negative shape of your pattern. The mold is created from a mixture consisting of casting plaster, sand, and water. When it is mixed with water, it forms a viscous slurry. After about tens of minutes, the mixture sets up or becomes solid.
- A. Place some brown paper on the floor in the area where you are going to work from the roll in the machine shop, near the bandsaw. Working with plaster is exceedingly messy and hard to clean up. Lay out a lot of paper and you will thank yourself come cleanup time.
- B. Prepare the pattern. Draw the parting line or lines on the pattern with a pencil, or a score lightly with a blade. Parting lines should be drawn so that there will be no undercuts. That is, if you immerse the pattern into the plaster up to the parting line, you will be able to remove it when the plaster has hardened. This is important: if you have undercuts in your clay pattern you will not be able to remove your wax pattern later on without destroying it. You should also coat the pattern with Vaseline which will make it easier to remove from the plaster.
- C. Make a cardboard box that is about several inches wider, longer, and thicker than your pattern. Tape the sides together with duct tape. You will be pouring the liquid mixture into this box.
- D. Make up some dry mix: Three things are very important in this step. The first is crucial to your health: wear a dust mask to protect your lungs. Dry plaster consists of very fine particles which become airborne, and are quite bad for you. The second and third things are crucial to the success of your project: When you mix the sand and plaster together, do not assume that 8 qts of sand and 4 qts of plaster make 12 qts of mix. The plaster particles are much finer than the sand and will fill in the gap between the sand particles, creating a smaller volume than the sum of the two individual volumes. Also, make sure that the buckets you use are spotlessly clean and completely dry. If there is a little bit of water in the dry mix bucket, it will form hardened bits of plaster which will catalyze the reaction when you mix water with mix causing it to set up too quickly.
- E. Compute the amount of water and mix required. To do this, measure the volume in cubic inches of the cylinder you are using, and convert to quarts. Multiply the number of quarts to get the volume of water you’ll need. If the volume of water required is less than 2.5 gallons, you will be able to mix the plaster in one bucket with the help of just one other person. If it is larger, you will need 2 people and 2 5- gallon buckets per 2.5 gallons of water. If this is the case, you will need to have each set of two people mix the plaster and water simultaneously so that it is ready to pour at exactly the same time.
- F. Measure out the water into a 5 gallon bucket. Again, make sure that the bucket is spotlessly clean. Any little bit of plaster left over from the last time someone investment will make the plaster set up before you have a chance to pour it around your pattern. Also, the ratio of water to plaster is important, so take considerable care in measuring the amount of water
- G. Measure out the mixture into a clean and dry 5 gallon bucket. Remember you must measure out the mixture now - do not assume that the 8 qts of sand and 4 qts of plaster you mixed before have made 12 quarts of mix! Many investments have been ruined by this error.
- H. Prepare to pour the mold. Place your cardboard box and the two 5 gallon buckets (one with water, the other with 30-30 mix) on the floor, and make sure your clay pattern is nearby. You will need to recruit one other person to help you at this point.
- I. Make sure that your hands and the hands of your helper are clean and dry, then sift the 30-30 mix into the water with your hands. You should do this quickly so that the plaster does not start to set up to early. Try to do the sifting in about 3 or 4 minutes. Try sifting the mix from just above the water, so as to not agitate it. Also, try to sift evenly over the water so that the dry mix gets well distributed and does not end up in one gigantic mountain in the center of the bucket.
- J. Wait for 2 or 3 minutes so that the water has a chance to soak up the plaster.
- K. Mix with your hands gently to combine the 30-30 mix and the water. Work out any lumps of plaster.
- L. Pour the plaster into the box until it is half full. You should do this as soon is the plaster is mixed, since you only have a limited time until it sets up. Place the clay pattern into the plaster up to the parting line. Hold it there until the plaster has set up (probably less than 10 minutes; if it hasn’t set up in 20 minutes you probably used to much water and it will never set up, in which case you should pull your pattern out and go back to step 1.)
- M. After the plaster has set up, carve 3 hemispheres about the diameter of a pea into the plaster with a wax working tool or knife. This will insure that the 2 halves of the mold line up. Leave the pattern in place and cover the first half of the mold with Vaseline.
- N. If you have only one parting line, then mix the plaster as before and pour it into the other half of the box. If you have more than one parting line, see the variations section..
- O. When the plaster has set up take the mold apart and remove the pattern. You may need to pry the plaster apart with a flat head screwdriver by working it around the outside of the parting line.
- P. Carve a channel into one plaster section of the pattern so that it is possible to pour wax into the void.

3. Create a hollow wax pattern.
- A. Heat up enough brown wax to fill your mold in the wax crock pot. It is extremely important to make sure that the temperature of the wax does not exceed 200 F. The flash point of wax (point at which it sets itself on fire) is only slightly above this temperature, and wax fires are very difficult to extinguish. Use a meat thermometer to regulate the temperature - do not trust the dial on the wax pot. You should pour the wax between 170 and 180 F.
- B. Prepare the mold. Coat the inside of the mold with Vaseline. Hold the pattern parts together with rubber bands wrapped around the outside .
- C. Pour the wax into the mold. Plug the pouring cup and swirl the wax around for a few minutes. Take the Sculpy plug out and inspect the thickness of the hardened wax. You want it to be about a quarter inch thick. If it is too thin, the metal may freeze off before it reaches that part of the pattern. It can be somewhat thicker (although it will be heavier.) If it is not thick enough, replace the plug and swirl some more. When you reach the right thickness pour the unhardened wax back into the crockpot. Open the mold and take out the pattern. If you had undercuts, you won’t be able to remove your pattern. Cut apart your wax pattern to see how good a job you did at achieving the desired even thickness of ¼ inch. Once you feel you have mastered the technology of creating waxes of even thicknesses, pour the real wax mold (and don’t cut it apart) .
- D. Smooth the wax. Dental tools (found in the jewelry cabinet) work well for removing flashing, and taking off and adding features. You can heat the dental tools up with a candle lantern, found in the flammables cabinet. Some people like to use a soldering iron (you can get a cheap one for about 8 bucks) for working wax. For fine surface smoothing, wrap some turpentine soaked pantyhose around your finger and rub the wax. The metal will accurately reflect the smoothness of the wax, so make it as smooth as you want the metal to be. You can always finish the metal after, but it is easier to smooth wax than metal. The wax should, at the minimum, be smooth enough so that bits of plaster don’t jut out into the void created by the vaporized wax. Such features will break off when the molten metal rushes in causing the inclusion of plaster in the casting.
4. Create sprues, gates and a pouring cup.
See the design guide figure below. Good sprue and gate design is critical. For gravity-poured castings (at the PRL, most anything larger than about the size of a lime) you should use bottom gating. In this method, a sprue goes down from the pouring cup, gates come back up to the pattern. Vents run from the highest point of the casting back to the cup.
Form the pouring cup, sprue, gates and vents. Several sprue and cup molds have been made over the years and are good for many uses. Coat them with Vaseline, run them under cold water, then pour in molten wax and wait until it hardens, then pull the hardened wax out. You can also make your own sprue and cup molds by the same method you made the pattern mold. Pre-made sprues and gates are available (at Gems Galore in Mountain View) which look like red licorice. They are pretty cheap, and work very well, but do not come in particularly large diameters.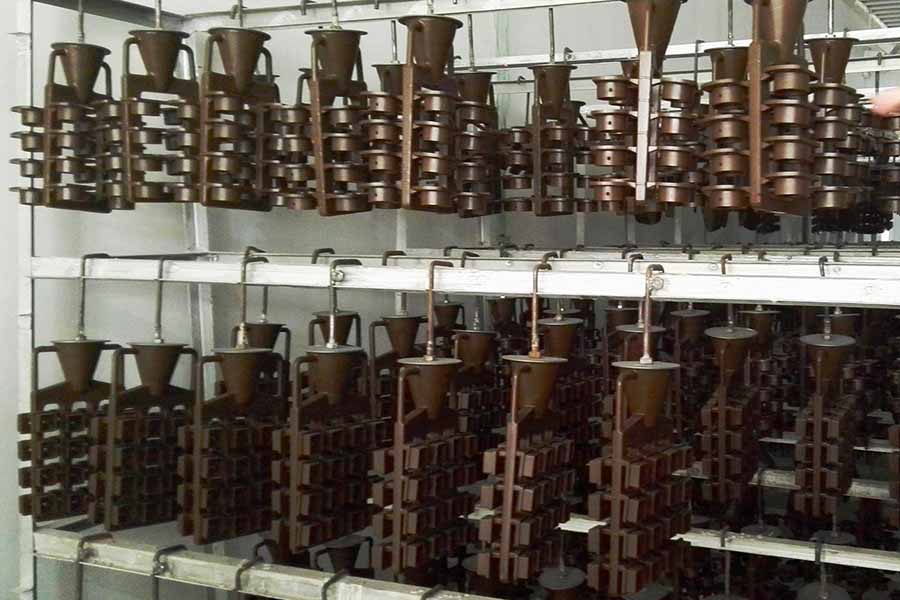
5.Attach the gates to the sprue, the sprue to the pouring cup, the gates to the pattern and the vents between the pattern and pouring cup.
This step is tricky; “welding” the wax pieces together requires some practice. Weak welds are very common among beginning casters. Set aside some time to practice in order to get your technique down.. You do not want your pattern to fall apart before it is invested in plaster.
Heat the flat end of a wax-working tool with a candle lantern, slide it in between the two pieces of wax to be welded. Slide out the tool, and then hold the wax pieces together for a minute. You need to hold the two parts together very steadily in order to avoid weakening the weld. With practice you can get a strong weld this way. If you think the weld may be weak, you can improve the strength of the weld by augmenting it with thin slivers of wax which are warmed by holding in the palm of your hand, then placed so that they overlap the weld line. You can then use a heated wax tool to blend these slivers in. As an alternative to a heated wax tool, you can use an electric soldering iron to heat the wax.
6. Insert core pins if your pattern is hollow.
Core pins are used to keep the core (or hollow center) of your pattern in place after the wax melts out. Failure to use core pins, or improper use of them, results in core shift (which means the plaster core moves), and can ruin the casting. You should use silicon bronze boating nails which have hatch marks in them. The hatch marks help keep the pins in the plaster. They are available at West Marine in Mountain View.
7. Assemble your wax with the flask and board.
- A . Select an appropriately sized steel flask. You will need an inch of clearance around your pattern and between the tip of the sprue and the top of the flask.
- B. Attach the tree (the sprue, gate pattern assembly) to a piece of masonite or plywood by the pouring cup. You will need to melt the pouring cup onto the board so it sticks. A board with a rough surface (such as masonite) works best.
- C. Debubble the casting. Brush on some debubbler solution. This is basically a soapy water mix that keeps air bubbles from sticking to your casting. Air bubbles on the surface of your casting turn into metal warts when the casting is formed. They can be removed after, so air bubbles are not completely disastrous, but it is better not to have them.
- D. Place the cylinder around the tree, and insure that you have good clearance. Create a wax fillet on the outside of the flask between the flask and board. A nice way to do this is with a disposable 2” paint brush. Dip the brush in molten wax and brush around the base of the flask to create a fillet. This fillet will seal in the plaster so that it doesn’t seep out. If you don’t have a brush, you can cut slivers of wax and melt them around the base, then hit the fillet with a propane torch to improve the seal.
8. Invest.
This is when you mix with water and pour it around your wax pattern. You can use the same mixture and method as you did when you created the mold.
- A. Follow steps 2A, and 2D through 2J to create the liquid mix, or follow the instructions。
- B. Pour the mixture into the flask. One person should pour while the other person both continues to mix the investment (otherwise, it settles out and the investment in the bottom is much thicker than the investment on the top), and guides it into the flask. Try to guide the investment so that it does not pour directly onto the pattern, sprues, or gates. A heavy flood of investment can knock your pattern over if you are not careful.
- C. Tap the side of your flask with a piece of scrap metal in order to remove air bubbles from the investment. Do this for about 5 minutes, or until air bubbles no longer rise to the surface. Alternatively, you can put your flask inside the vacuum machine in the Plastics Room to get the air bubbles to rise to the surface.
- D. Let the investment sit for 24 hours.
After the investment has sat for 24 hours, it is ready for the kiln. You will need to pour the metal immediately after removing from the kiln.
- A. Remove the wood base from the flask.
- B. Load the investments into the kiln. Be gentle with them. You should arrange each investment on top of firebricks so that the pouring cup is on the bottom but is not directly on top of a firebrick. This allows the wax to drip out of your pattern. It is a good idea to put the largest investments near the front of the oven, since they will be the last to burn-out and it will be easiest to check and see if they are burnt-out. It is also hard to pull a large investment out of the back of the oven.
- C. Decide on an appropriate burn out schedule. Burn-out schedules can be found in the appendix. Ask a knowledgeable expert if you need help picking a schedule.
- D. Set up a temperature measurement system. The shop owns a fluke voltmeter with a temperature probe which is an excellent choice.
- E. Turn on fume hoods. Turn the one on which is over the oven/kiln area, and also the one which is near the muller/royer area. Open all the windows except for the ones near the muller/royer area (otherwise this fume hood just sucks in air from outside.) The fumes created by melting wax are not good for you!
- F. Ignite the Kiln. First, make sure that the kiln door is closed. Round up a couple of paper towels and a lighter (or propane torch). Observe that at the back of the oven there are two gas petcocks, located at about knee level, one on the right, and one on the left. These regulate the amount of gas which flows into the oven. In the middle at about waist height there is an air flume. As you are looking at the back of the oven, off to your right and behind you a bit is a gas valve located on a pipe which goes to the kiln. This is the main valve. You will want to do the following steps fairly rapidly, so make sure you understand all the steps before you start.
Put on a long sleeve shirt and some fireproof gloves. Make sure that the two gas regulators are completely closed. Gas valves are closed when the handle is perpendicular to the axial direction of the pipe. Open the flue to the 2.8 marking. Open the main valve all the way (so that the handle is in-line with the pipe). Roll up a paper towel into a wand shape. Light the end of it, and stick it into the hole below one of the petcocks. Open this petcock part way so that it makes a 45 degree angle with the pipe. At this point, the gas should ignite and you should see a flame burning if you look into the hole. If this doesn’t happen, turn off the regulator immediately, and try to figure out what happened. It is very dangerous to have the oven fill up with gas, since when it is ignited, it can explode and blow the shop to Kingdom Come. If everything went well with lighting the first petcock, light the other one.
- G. Watch the oven. You should do this in shifts since it is not only boring but also unsafe to have one person sit by the oven for too long. Oven sitting has two major responsibilities. Most importantly, you should make sure that the kiln stays lit (check to see that there is a fire coming out of both regulators). Otherwise, the kiln and room are filling up with explosive gas. You should also make sure that the oven is following the burnout schedule. You can moderate the temperature by adjusting the 2 regulators at the back of the oven. Remember, in line is completely open, perpendicular is completely closed. A few hours after the burn- out has begun, you will hear the sizzle of molten wax, and smell the associated noxious vapors. Position yourself away from the oven at this point, and only walk over there every 10 minutes or so to check on the temperature and flame. These vapors aren’t exactly good for you.
- H. After the investments have soaked at the maximum temperature for the full length of time suggested by the burn-out schedule, check to see that they have all burnt-out. Suit up in the full silver space suit gear, including the hood. Turn off the main gas line and close the flue. Closing the flue is important because if you don’t do it, cold air will rush in the open door, out the flue, and perhaps cause enough thermal shock to the investments that they crack. Open the oven door. Note that the inside of the oven is quite hot! If any flames are coming out of the pouring cups or vents, the investments are not burnt out, and you should close the door and relight the kiln (explained below). Tilt the investment up so that you (or someone else also wearing a silver suit) can look up into the pouring cup. The casting is burnt out fully if and only if the pouring cup is white with no black streaks. Black streaks indicate that a carbon residue still remains in the investment, and that more burn time is needed. Pouring metal into a not completely burnt-out casting is catastrophic-the metal can explode back out of the investment, which is dangerous. If the largest casting is completely burnt- out, then it is likely all the others are too. In this case, you can leave the oven off with the door closed, and let the investments cool a bit to the pouring temperature. If the castings are not entirely burnt-out, close the door, open the flue, and open the gas line. You will probably not have to relight the kiln - it is probably hot enough that the incoming gas will ignite itself. But check to make sure that you can see a flame through the hole underneath both regulators.
10. The Pour.
- A. Prepare for the pour. Clear out the aisle that runs along the oven and kiln. Place some sandbox sand on the concrete floor and long enough to easily place all the investments with a bit of room in between. Heat up what you are certain is more than enough metal ahead of time in the furnace.
- B. Pull the investments out of the oven. After again checking to make sure that the oven is off, suit up in the silver suits. Removing the castings from the oven is physically demanding. The best way that we currently have to do this is to set up a stool in front of the door and place a fire board on top of it. The top of the fire board should be very close to the height of the base of the inside of the oven. Investments can then be dragged onto the fireboard with a pair of tongs, then carried (by two suited people) to the sand area where they are flipped with the tongs so that the pouring cup points up. This works well from small to medium size castings. Very large castings present a problem.
- C. Pour the metal. You can pour just like you would for sand castings. As usual, try to pour quickly so that the metal does not have a chance to cool
- D. Allow the castings to cool. Wait at least 6 hours before breaking the castings open. This is more than enough time, but it is much better to wait too long than not long enough.
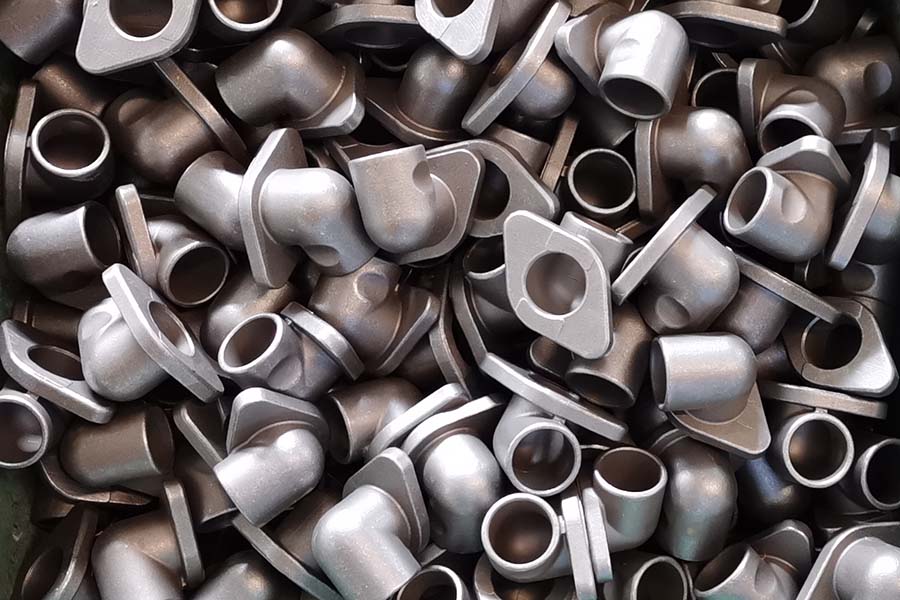
11. Break open your casting.
Lay down brown paper in the usual fashion, and use a chisel to knock out the dried plaster. Be sure to dispose of the dried plaster in the dumpster, and not down the sump.

12. Finish your casting.
Finishing is a time-consuming and difficult process, but it is also extremely crucial if you want your casting to look good. This section is admittedly sparse. Much could be written about finishing. Here are the basic steps
- A. Remove the sprues and gates. This can be done on the bandsaw. You will probably need to do some fancy fixturing if your casting isn’t rectilinear. You can probably construct a stable structure using wood clamps and scraps of wood. Get a TA to help you with the setup - this is tricky and dangerous.
- B. Sand or grind off what is left of the gates. Depending on the geometry of the gates you can use a belt sander, die grinder, or dremel tool.
- C. Remove the core pins. Sometimes they can be pulled out, but usually they will need to be drilled out.
- D. Fill in the core pin holes or any sinks that may have occurred. Make sure that you fill them in with the same material that you used for the casting. PRL has a variety of welding rods including aluminum and silicon bronze. Probably the best way to get this done is to be nice to someone who knows how to TIG weld and get her to fill in the holes.
- E. Regrind the TIG welds.
- F. Finish. The best way to finish your casting is to patina it. Patinas speed up the natural oxidation and corrosion processes. This gives the castings a beautiful and venerable look. There are hundred of recipes for patinas, and they create all sorts of different color finishes. An excellent reference on this topic is “Metal Techniques for Craftsmen” by Oppi Untracht. Dave Beach has a copy. The PRL has had the most success with the black (it’s really more of a dark brown) Liver of Sulphur patina, so this one is recommended.